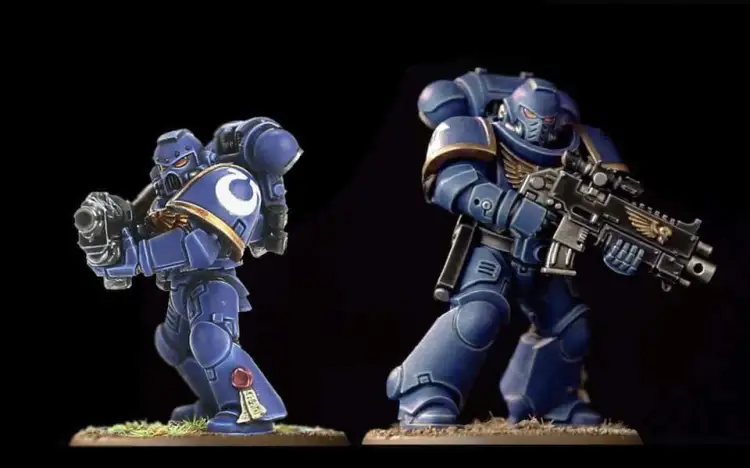
June 2017: I’m sure this is your first question –

The Primaris Space Marines are slightly taller and a little bulkier, so I’ll be revisiting this article soon to give people an idea how to do two things:
Make the Primaris Space Marines into regular Space Marines, and Make regular Space Marines Primaris size/bulk. As it is though, this tutorial will certainly get your Marines close enough to blend together on the tabletop as Primaris conversions.
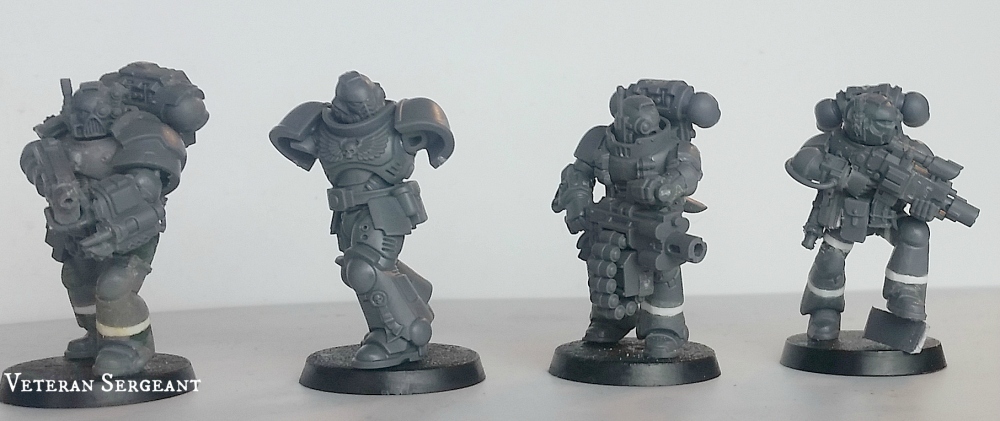
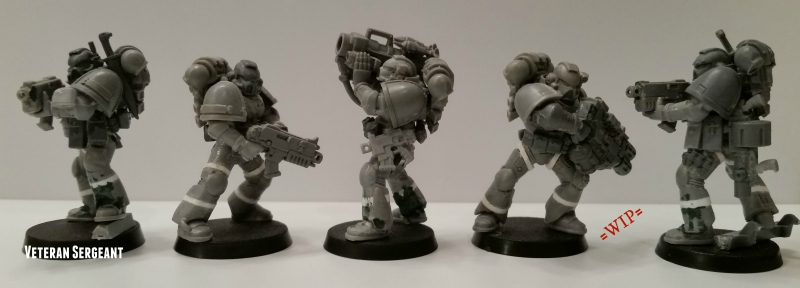
You can see the Primaris Space Marine size comparison next to a regular model at the bottom of the post.
So, how exactly do you make True Scale Space Marines? Here’s a handy tutorial:
In the end, you’ll have turned a 10 part model into a 40 part model. Sound like fun?
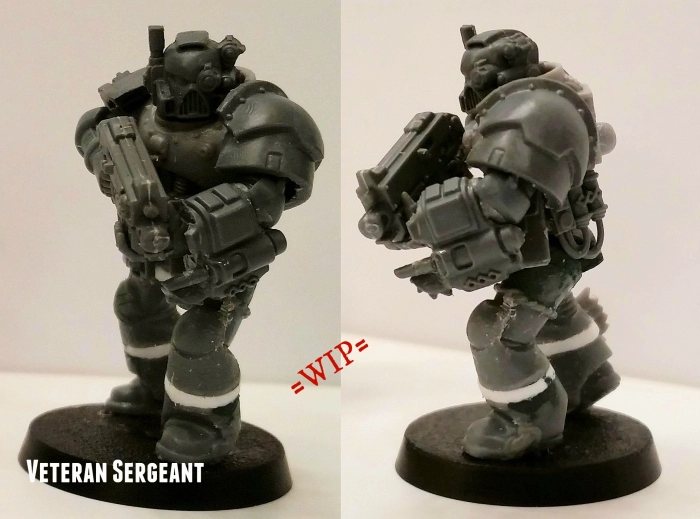
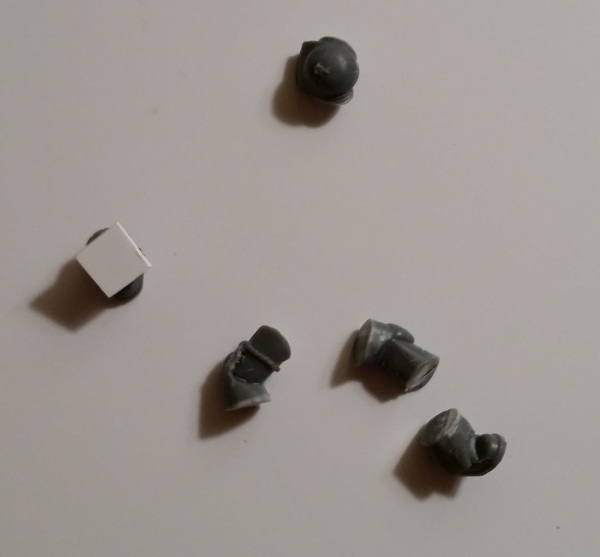
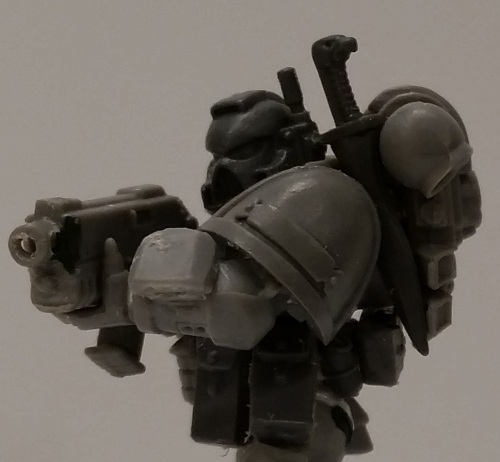
My two primary demonstration models will be this Apothecary here:
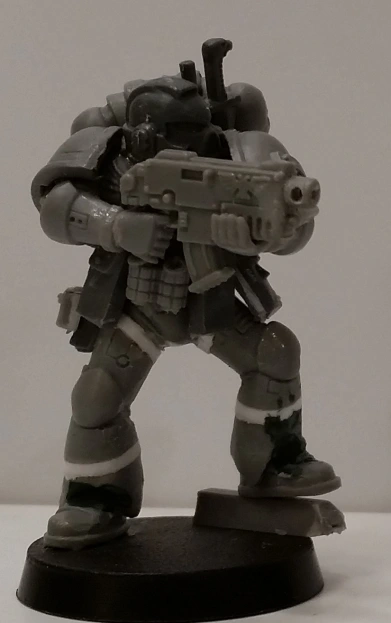
And the Section Leader
Step 1: Preparing the models
Well, the first thing that needs to be done is to decide what you want to do with the model. In the case of the Apothecary, I liked the posture of his legs, so I was only going to be extending them, rather than a full rebuild. In the case of the section leader, I was using the old “squatting” legs from the old Tactical Squad kit, and wanted to do a fully new pose with him. This meant cutting the feet free of the model.
With these projects, I’ll typically work in batches. You’ll need to allow time for all the components to dry and set once you’ve glued them anyway, so doing them in groups of 4-5 may cut your downtime significantly. You can see with the ones below, I’ve removed their feet. The difference in the poses you can achieve can be dramatic since the foot will no longer be anchored to the leg in a static position.
However, if you’re using specialized legs, or if you’re simply happy with the pose the legs are currently in, you can leave them alone. In the case of the Apothecary, his legs came from the Death Company kit, and I was happy with the way they were standing. So I moved on to the next step, which was inserting plastic card spacers.
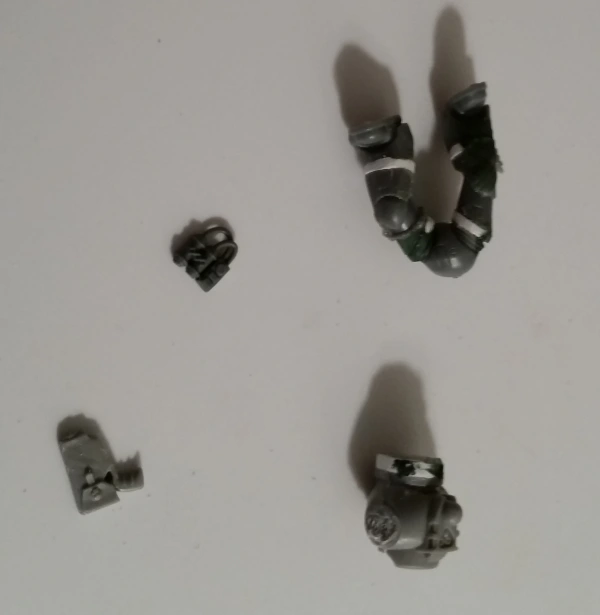
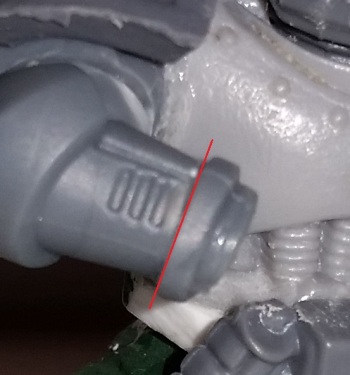
I use 1mm thick card on the legs. One in the shin, one at the hip. If you’re keeping the pose, you might want to do a mid-thigh cut, but I’ve found I like the waist cut better. It gives a lot more options later.
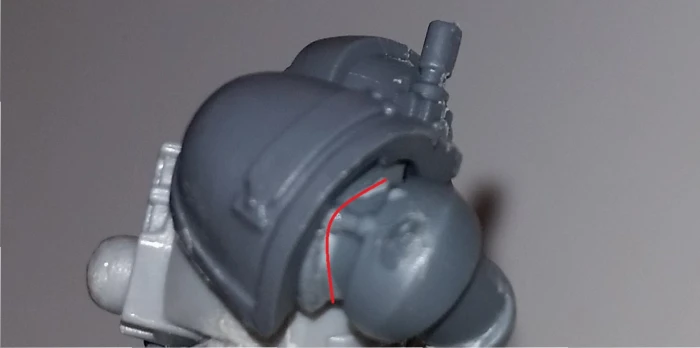
For the torsos, I use 1.5mm thick plastic card, cutting it into strips to line the outside of the torso “ring”. Cut/file the outside edge smooth, then, using a rounded-tip hobby blade, scrape the inner side into a rounded shape. Adding another small square inside (or some putty) will allow more contact points for gluing the torso to the legs later.
This will add length to the torso. Now, I add a lot of gear to my Space Marines because aesthetically I like them that way. If you aren’t going to be adding pouches and grenades, you will need to invest in some Green Stuff to model out their belt lines.
Step 2: Re-assembly.
Carefully, using hobby snips or a hobby blade, cut the excess down around the legs. Then, even more carefully, use the blade to trim it as close to the contour of the leg as possible. Once this is done, you can file it smooth if necessary.
Once you’ve shaved down the plastic inserts, you’ll want to use either Green Stuff or Liquid Green Stuff to fill the gaps.
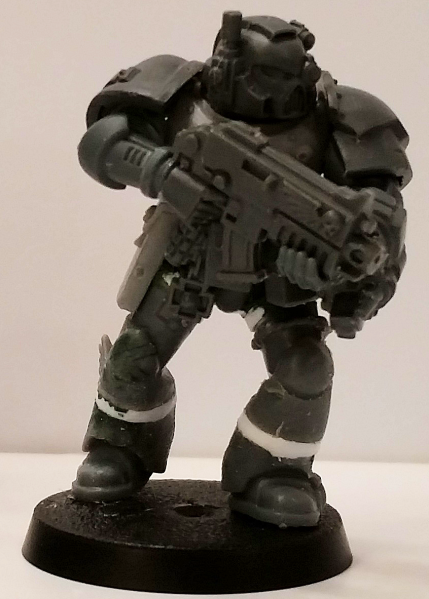
Now to prepare the pose. What are your True Scale Marines doing? Are they aiming? Patroling? For the Apothecary, I wanted him to be holding his gun at the “alert”, which means with the muzzle pointing slightly downward, but ready to be brought up for firing. I felt this gave a certain “attitude” to the model. So how do we accomplish this with the lackluster arms provided in most Space Marine kits? With a knife of course.
Any time you’re posing a Space Marine (or any model for that matter), you want to be considering range of movement. At the very least, try the pose yourself. If you can’t do it comfortably, why would the Space Marine? If you’re trying to impart a swinging motion with a melee weapon for example, try a couple swings while watching yourself in the mirror. Make sure you know how that weapon is used in real life too. You swing a top-heavy weapon like an axe or a hammer much differently than you swing a sword which is balanced closer to the grip.
My Apothecary looks like this:
So, how do we get there?
Sorry I didn’t take any in-progress pictures of the arms. That was an oversight I’ll correct in the future. For now, I’ll get as good of shots as we can for it. Fortunately I couldn’t find my small drill bit for the barrel so the boltgun isn’t glued in place yet.
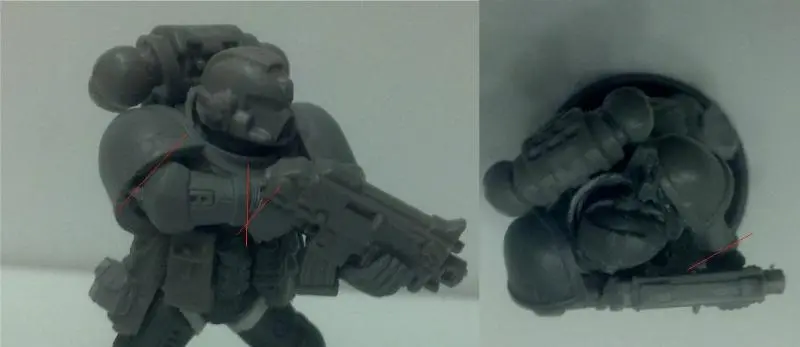
Here’s a basic diagram of the arm cuts.
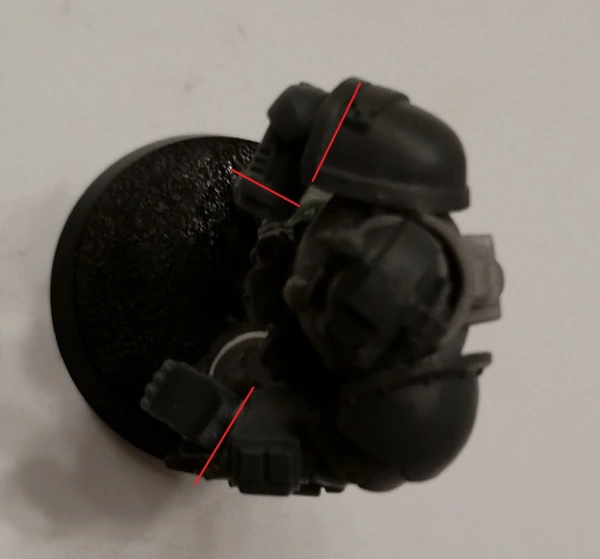
First, we’re going to clip the arm just below the “under shoulder” that the shoulder pad attaches to. Once this is done, we can rotate the arm to do whatever we want, from an aiming pose, to the “alert” pose. This cut is fundamental to pretty much all the Space Marines I do, and is the base of posing. Think about your own body. Almost all of the directions you can move your arm start at the shoulder.
Second we’re going to clip the wrist and flip it around so that the wrist soft armor is sloping up, instead of down. Sounds confusing, but an upward slope will obviously give us a downward angled hand.
Now, since we’ve fundamentally altered the way the right hand sits, the left hand isn’t going to sit flush on the bolter. So it needs to be cut free and rotated. You can see this best on the Section Leader:
The Apothecary doesn’t make a great example because I had to cut the whole forearm off that model to replace it with the Narthecium anyway. Here it is on another model, and you can see the far more drastic angle that the cuts achieved.
And there you go. You’ve now made a 30-40 part model:
- Legs – 11 parts
- Torso – 6-7 parts
- Arms – 2-5 parts each
- Head
- Pack
- Weapon (my Cerceus Pattern Bolters are 3 parts, but you don’t have to go that crazy)
- Gear (I use anywhere from 10-14 accessory parts per model)

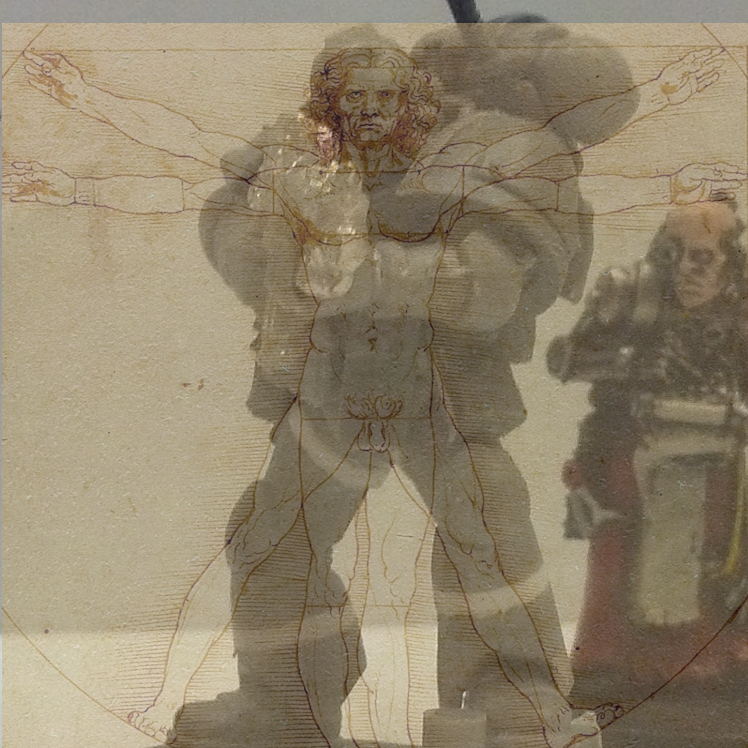
So, do the new proportions work? Let’s ask Leonardo Da Vinci:
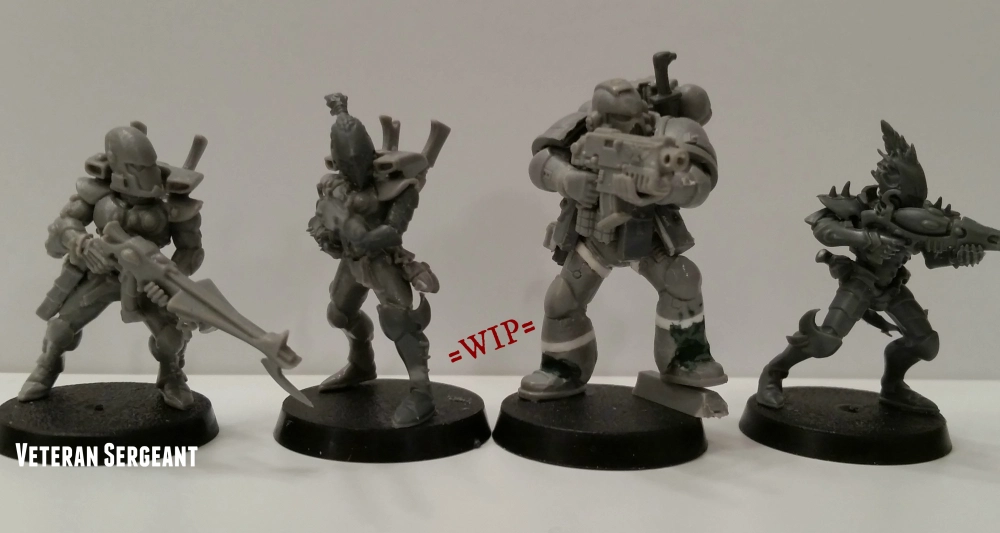
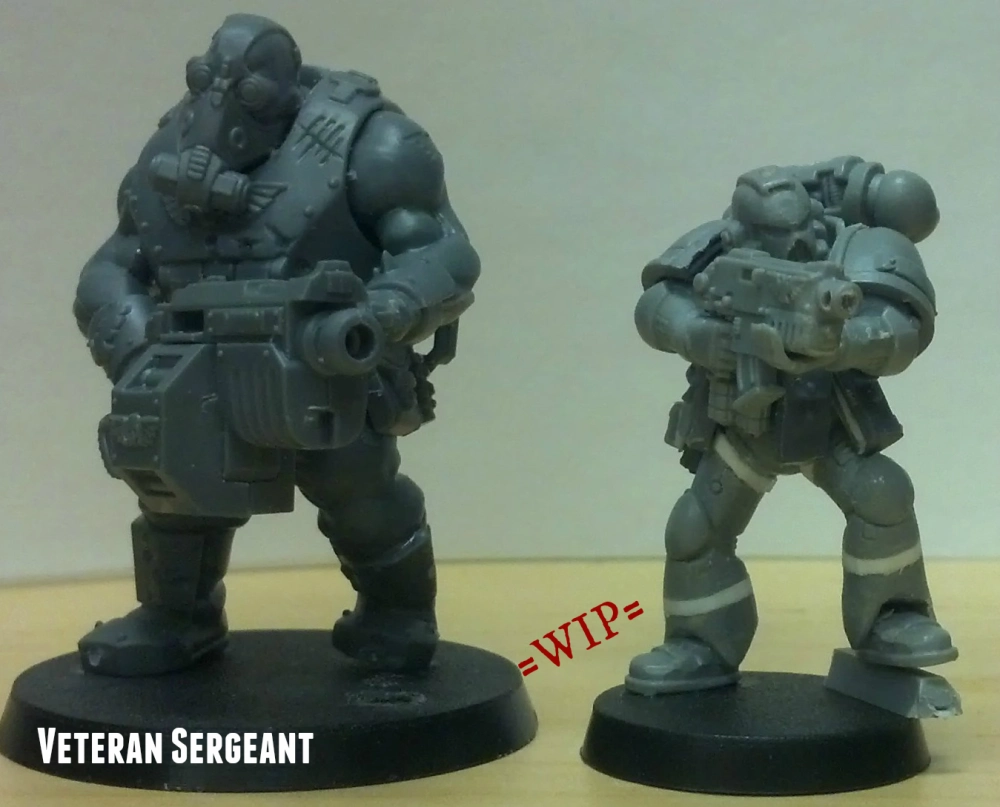
Where do they stand next to other models in the Games Workshop range?
Next to some of my Eldar Corsairs here:
With a Steel Legion Ogryn here:
With a Tau Fire Warrior pulse rifle conversion and one of my Ork conversions. Though the Ork has been converted to be taller than the usual GW model. You can check out my article on Ork Boy Conversions if you’re interested on the details of that project.
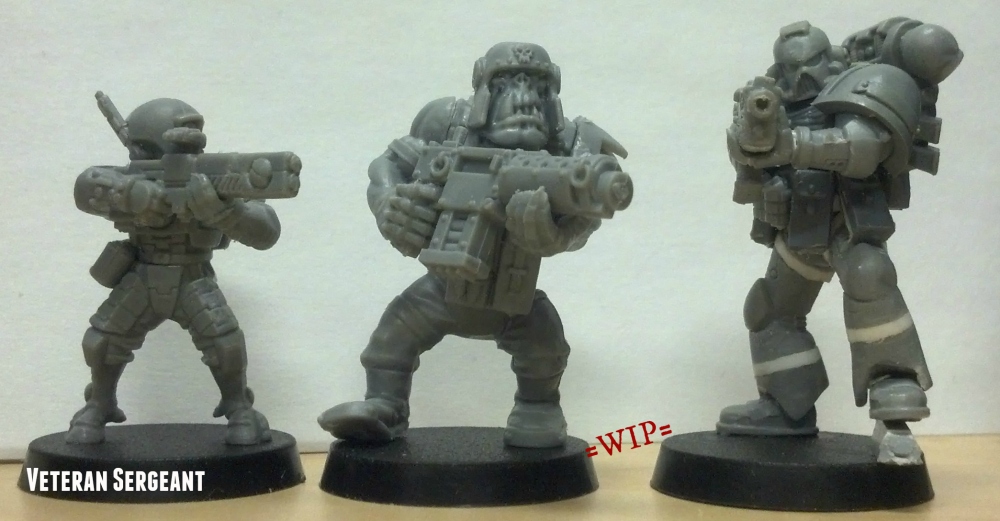
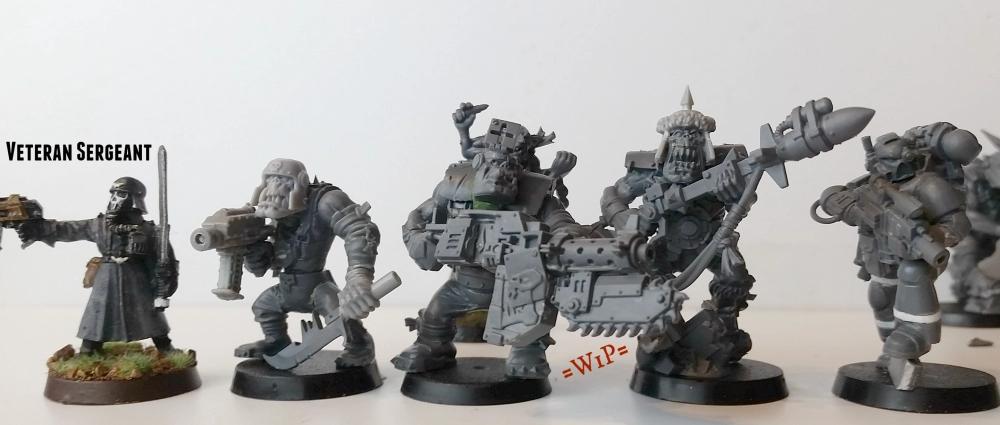
Alongside Genestealer Cult conversions of Neophyte Hybrids from the Deathwatch Overkill game
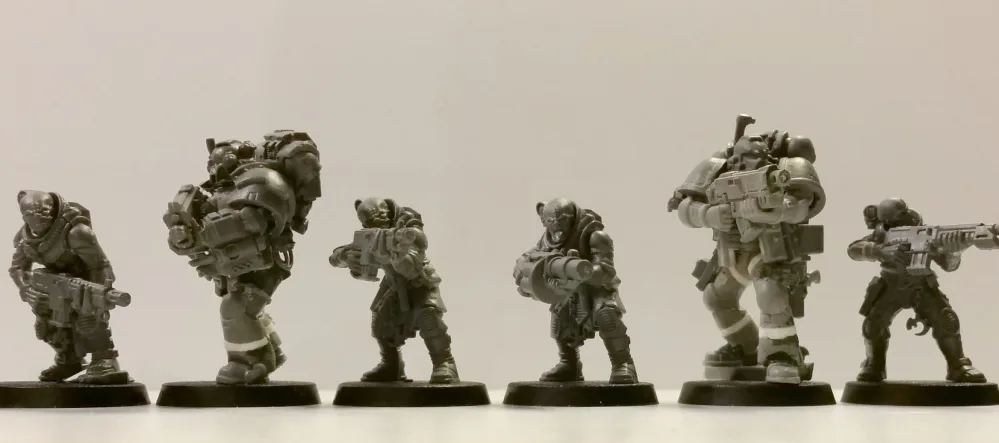
May 16, 2017: Somebody mocked up this Primaris Space Marine scale and size comparison:
Just looking at them, the Primaris Space Marines will be slightly bulkier, but roughly the same height as the True Scale Space Marines you can build with this technique.
Questions? Comments? Leave one below!
Following my page on Facebook is a good way to keep up on the zany conversion projects I’m working on.
https://www.facebook.com/LeaveNoModelUnconverted/

Awesome! Have you ever tried using green stuff instead of plasticard? Do you think it would work as well or is plasticard better in the end? I was thinking of using green stuff and a ruler to get the measurements right. I want to true scale my marines and I have a lot of left over green stuff and I’m not sure whether I want to go through the effort of finding some cheap decent plasticard (and not have so much left over). Thanks!
LikeLiked by 1 person
Well, green stuff will always be needed to fill in the small gaps and smooth out the imperfections that might result from the process, but ultimately, for the technique I use, plastic card is both easier, and precise. So I guess the answer is “Yes, but both”.
Honestly, plastic card is so cheap compared to the cost of everything else in the hobby (models, paint, files, sculpting tools), even if you have any left, it isn’t much of a loss. I’m literally still going through the very first packages of 6×10 (ish?) sheets I bought several years ago, 50 or so Marines into the project. And I got mine at the local model/RC/drone hobby shop. I think you’d lose more time trying to exactingly measure out green stuff than you would just using card. That’s why for True Scale Space Marines, you either see versions using Terminator legs, or you’ll see ones like mine which use card to elongate the regular kit power armor Space Marines. Simplicity and consistency. I just cut the legs, glue card, cut, file, smooth, and then I know that I have added 1mm to that section. The torso has a 1.5mm ring, and I know it’s the same length immediately.
Nothing says you shouldn’t try using green stuff, but I’d guess that doing it over and over would be exhausting. Not that using card isn’t, I guess. True Scaling is a labor of love. Or madness. But the end results can be amazing.
LikeLike
Hi! I’m Luis, I’m great fan of your blog and conversions, The building and converting it’s the most interesting part of the hobby. ( I’m Chaos abd Ad Mech collector )
Congratulations and I will try to build True Scale space marines following your tutorials
Thanks!
LikeLiked by 1 person
Thanks Luis! Glad you have enjoyed my blog and good luck. It’s 50% creativity and 50% patience, because the work isn’t terribly hard, just time consuming. If you do end up making them, feel free to share them with me on Facebook.
LikeLike
Hi Loving the blog been a fan/ admirer of the models you do for a while, and i’m just starting to experiment with more modelling of my marines. Any tips on cutting the arms/ legs? do you just use a hobby knife with a very sharp edge or do you use something more heavy duty?
Thanks
LikeLiked by 1 person
Thanks Adam.
Almost all the cutting is done with Xacto #1 or #2 knives, depending on the leverage I need. Obviously I prefer the #1 for its precision. Occasionally use the general purpose or deburring blades if the task suits it.
LikeLike
you say almost, so what else do you use, because i’m struggling to cut through the legs with just a xacto.
LikeLiked by 1 person
Hi Derek. I guess that’s somewhat confusing. The only other things that would qualify as “almost” are just different kinds of blades. I’ve used #10 or #24 blades, for example depending on whether or not I needed different leverage. The long, narrow-point blades have an annoying tendency to snap the tips off.
This is, unfortunately, where the patience part comes in. The modern GW plastic is somewhat hard (compared to older, softer plastics in previous kits), so there’s just going to be a fair amount of muscle (and sore fingers) involved unless you want to invest in more expensive tools.
LikeLike
Wow. This is great. I play warzone Resurrection: Mutant Chronicles. I want to make a Dark Legion illian army. The main troop are the Templars. They are like dark, evil high tech knights. I decided to use chaos space marines trimmed of all the extra Chaos iconography and no back pack.
I put together a test model and he was to short and stubby against regular Bauhaus Infantry. These guys need to big, hulking dudes.
I’ve looked at several true scale marine tutorials. I like yours the best. I will give you credit for your ideas. It never occurred to me to MAKE true scale 40k models. Gee Dubs really needs to get on that.
I would make regular humans 1/72 scale 20mm tall. That makes your true scale marine an accurate 10 feet tall. It does mean marine weaponry is to big for a regular human to use. Oh well.
LikeLiked by 1 person
I’m glad you liked it Ron. If you want really big Space Marines, 20mm humans are the way to go. I’ve kinda stuck with the old 7.5 feet tall depiction from the old-school fluff, which means the models needed to be about a head and a half taller than the humans. They will definitely be giants next to 20mm though. Even next to my 28mm Perry Wars of the Roses figures they are huge.
I think the fluff has always supported the idea of Marine weaponry being too big for regular people to use. It’s just that the scale of the models never really conveyed that feeling on the tabletop. Good luck with your project! I enjoyed the Mutant Chronicles universe years ago (I played the Doomtrooper card game as a kid). It can be a lot of fun, and the newer models are actually pretty good looking, even if I’m not a fan of Prodos as a company.
LikeLike
Hi, love your work. Do you always use standard marines as a base? Looking at sternguard/vanguard/character models, there doesn’t always seem to be a good place to make the cuts! I’m wondering if I can get away with only one cut on the upper leg, or even no cuts and just extend the legs upwards with greenstuff. Thanks.
LikeLiked by 1 person
For the most part, yes, for the exact reasons you stated. I’ve found the Sanguinary Guard, Death Company, and Grey Hunters sets have some usable legs, but only if you’re willing to buy them individually from a bits vendor. I can’t really recommend buying the entire sets unless you plan to make those Chapters. And even then some of the legs aren’t ideal. The Apothecary in the article has Death Company legs, but it took a lot of cleanup work to use them.
The Sternguard set was especially disappointing since all the models have tabards, which I don’t really like to begin with, but also make the surgery involved to upscale them pretty extensive. Vanguard models are a little better, but you’ll have to end up sacrificing some of the ornamentation.
As far as getting away with one cut, you’ll lose some height compared to the others, but it might not be supremely noticeable. Could cut the soles of the boots off and slide an extra .5mm card in there (and glue the soles back on, obviously, so you don’t lose the tread detail) which will make up part of the difference.
But in the end, the easiest legs to use will come from the Tactical, Assault, and Command kits. The less detail on the legs, the easier they will be to work with. Since I’m not a big fan of overly ornamental and decorative Marines, this was never really a problem for me.
LikeLike
I Love your work battle brother, I was just wondering if you recommend using this method to convert Logan Grimnar, will it even work or just ruin him?
LikeLike
No idea. As a general rule, the more ornate the figure, or the more things that touch the legs, the harder it is to cut apart. It’s why I avoid the Sternguard kit, for example. The tabards are more effort than they are worth. Do you mean the current one that has the wolf-sled? I’ve never seen the sprue up close, but it definitely has a lot going on on it. On the upside, he’s actually split at one knee, which simplifies that part. And his torso is a separate piece from the legs, so that’s a bonus. That other leg will be the balance of it. If you can separate the detail from the leg, you might be golden.
The other option, and I’d almost recommend it, is to just buy one pair of Wolfguard Terminator legs as a bit on Ebay and then mount Logan’s Torso on them. A few of those seem like they can be cut apart easily. it’ll tack a few dollars on the cost of the model, but could save the headache. Obviously, make sure that the torso actually fits on regular Terminator legs. I haven’t seen it up close, so I’m just assuming it does, or will with some slight modification.
LikeLike
What do you think about Chaos Space Marine legs?
LikeLike
In what way? I really dislike the currently long-outdated Chaos Marines kit. But I’ve created a handful of Chaos Marines. They just take more work because the legs have a lot of detail on them you will have to fix with small amounts of green stuff. Raptors have decent legs if you can buy them as bits on EBay. Actually, the whole Raptor kit is cool, though obviously not cost-efficient since you’re paying almost as much for 5 minis as you are for 10 in the normal box.
Hopefully Chaos Marines have a new troops box on the horizon. But as it stands, there’s nothing really stopping you from using the current kit to replicate this process. It’s just going to involve a little more work. Of course, the other option is to file the details you’re slicing off completely rather than repair them.
LikeLiked by 1 person
Is that Primaris to normal space marine and vice versa conversion tutorial still coming? it would be really helpful.
LikeLike
I’d like to, and I’m sure it will at some point, but I’ve been consumed by some other non-modeling projects and my free time for hobby stuff has been getting eaten into by those things. My attention has been away from 40K for a little while.
LikeLike
would it be possible to 3D scan existing legs, true scale them in some CAD software and 3D print those???
LikeLiked by 1 person
Maybe, but we’re beyond my wheelhouse there. You’d have to elongate the legs without increasing the waist circumference (so they still fit the torsos. Seems like that would be doable. I mean, they 3D print heart valves now, so I’ll just go ahead and assume you can do anything you want with CAD and a 3D printer, lol
LikeLike
Need to investigate this further.
True Scale Heresy would be awesome…
LikeLike
A great tutorial, I’ve just started building my Imperial Fists and changing their poses definately makes them a lot more interesting. The only part I’ve had difficulty with was with the 1.5mm card on the torso, the lack of photos has made a bit tricky to figure out how it should sit with the legs. But ignoring that slight problem I’ve enjoyed making cool space marines, thank you for an amazing tutorial.
LikeLike
These look phenomenal! I am following this tutorial to size up my iron hands tacticals and devestators. However, I am a little confused regarding how you did the torso bit, and I don’t exactly know what you mean by “torso ring”. Would you mind explaining in a little more depth this part of the conversion? For example, when you shave the inside of the 1.5mm plasticard with the rounded blade, do you cut a hole in it so the original grey plastic torso joint shows through, or are you just hollowing it out a bit?
LikeLike
It’s literally just plastic card cut and filed to fit around the “ring” of the torso’s belt area where it meets the legs. Then you can fill it with Green Stuff or other putty if you are worried it will be too fragile with just glue.
LikeLike
Nice tutorial. I have a squad of tactical marines already built and was wondering if you any ideas on how to repose them or know of another post that does. May be too late for them, but worth asking none the less.
LikeLike
Information in this article is priceless. I joined the hobby very recently and was wondering how to make Firstborn more adequate once I get around to making them (and lets be honest, firstborn are super cool). But I have a question. I see you have a knife next to models.
Do you use a knife, or do you perhaps saw them apart and then stick them together? I have a hobby saw and I wonder if it will be of use or if I should do some adjustments to what I see here. Like – a saw removes some plastic in the process, should I use thicker plasticard then? Or is it accounted for and will be all fine? I would really like to know, it would be very helpful.
Also – would this work for Terminators as well perhaps?
LikeLike
I have only ever used a knife. If I had converted some of my older metal models, I’d have gotten a saw. Hobby knives/Xacto blades are so cheap, it’s probably just worthwhile to get one (and a pack or two of extra blades for when you inevitably break them).
Glad you enjoyed the tutorial. I actually did a Terminator for Deathwatch Overkill. Part of the process was lowering the placement of the arms, so they aren’t sticking directly out from their necks. I should update this article with it at some point.
LikeLike
Heⅼlo There. I found your blog using msn. This is an extremely
smartly written article. I’ll bе sure to boоkmark it and come Ƅack to learn more of
your helpful info. Tһank you for the post. I wilⅼ definitely return.
LikeLike